#
Map components to columns
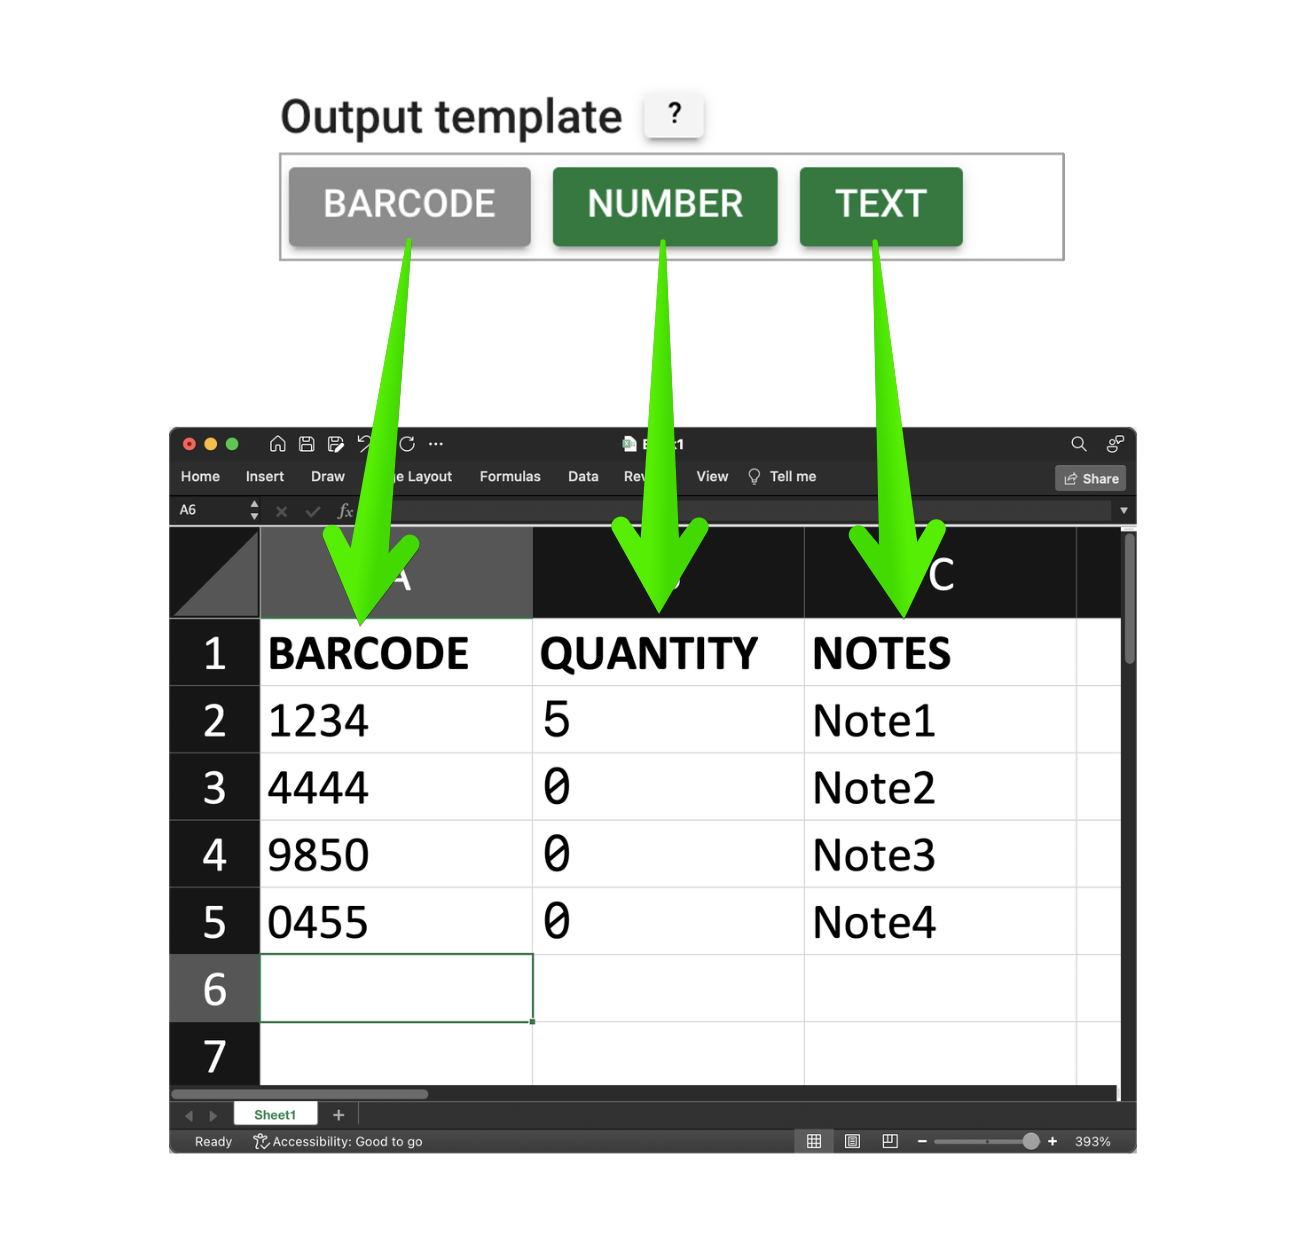
You can link the components of your Output Template to specific columns of your Excel spreadsheet.

#
Instructions
#
Step 1 - Create your Output template
Configure the components you want to use in your Output Template.
#
Step 2 - Set the label
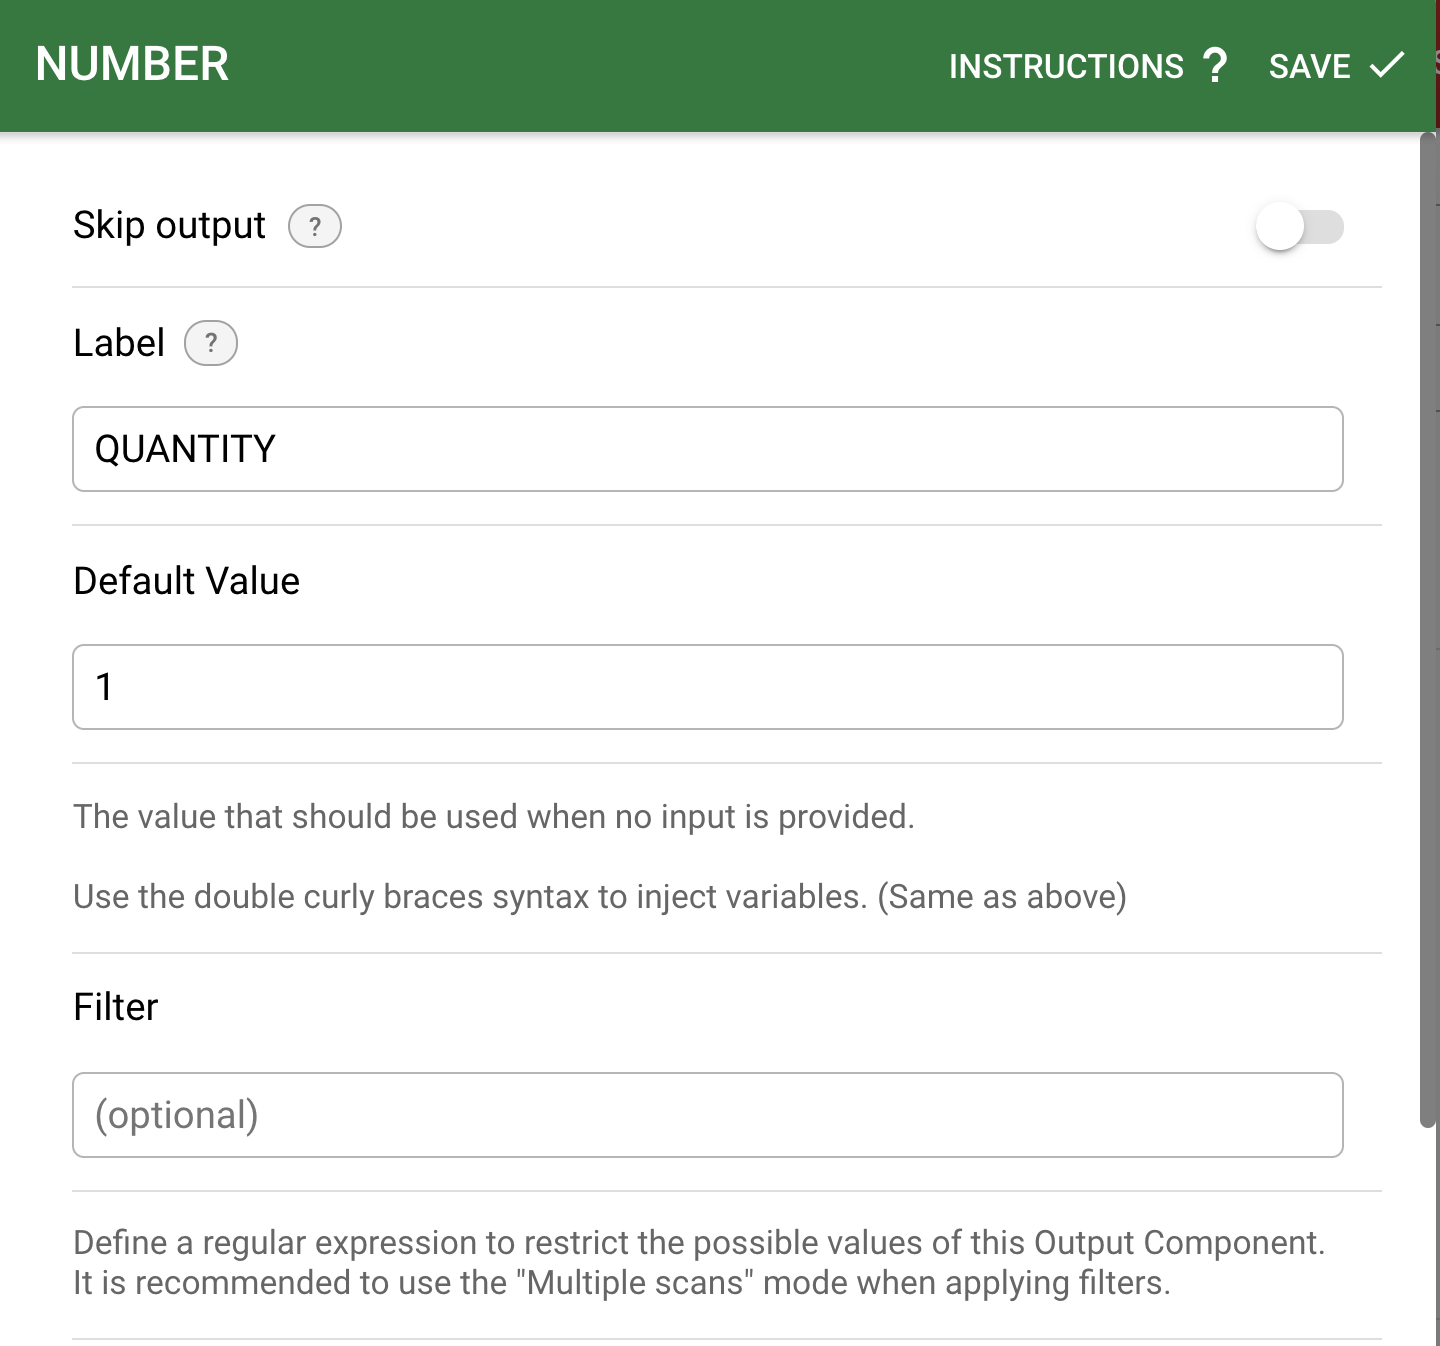
Select the component you want to map and configure its label to match your Excel column header.
For example, to map the NUMBER component to the QUANTITY column:

Pay attention
The Label value must match exactly the column header in your Excel file.
Double-check that there are no extra spaces before or after the text.
#
Step 3 - Save the settings
Click Save & Apply.
Update values
By default, Barcode to PC will add new rows to your Excel file. To update the value of specific cells in your Excel file, instead, change the Output mode option to Update values.
The Component label value will be used as search key to find the cell to update.
#
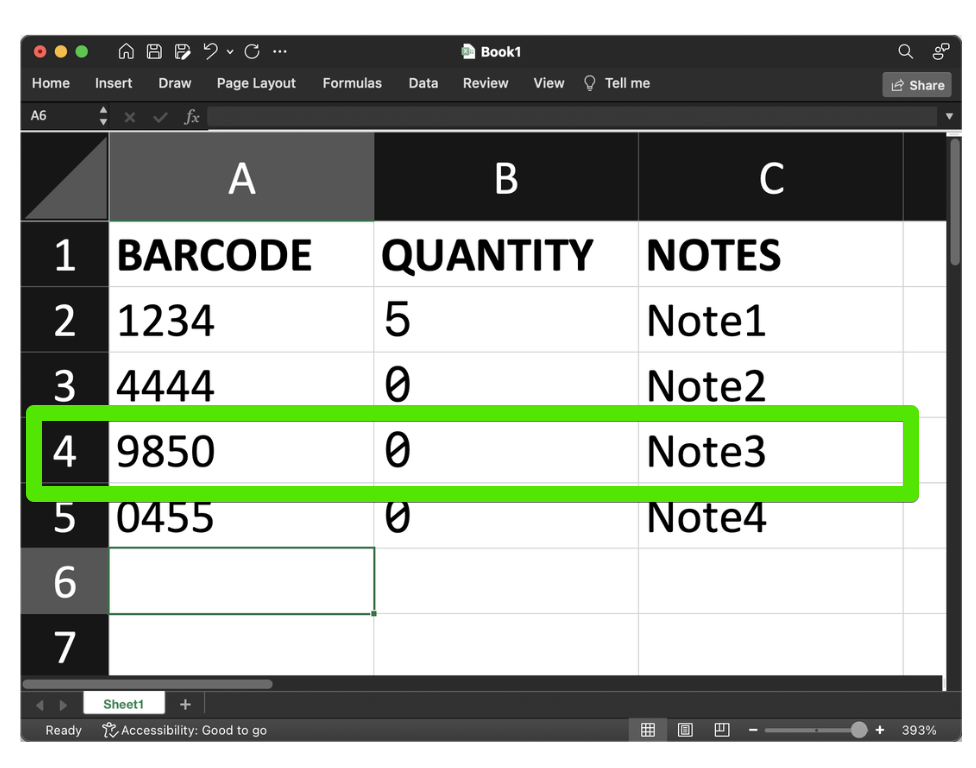
Example: Update quantity value
To update the quantity value of a product in your Excel file:
- Set the
Component labelvalue to BARCODE - Set the
Labelof the BARCODE component to BARCODE - Set the
Labelof the NUMBER component to QUANTITY
Ensure there are no extra spaces before or after the text, and that it matches the column header exactly.

The application will search through the file for a row where the BARCODE column matches the scanned barcode. When found, it will update the QUANTITY column with the value from the NUMBER component.
Pay attention
The Component label value must match exactly the column header in your Excel file.
Double-check that there are no extra spaces before or after the text.
